How To Make An Ultralight Backpacking Pot Cozy
By Erik the Black
A backpacking pot cozy is an essential part of an ultralight backpacker’s kitchen. This simple DIY project will help you to conserve fuel and make trail cooking easier and more efficient. Plus it provides a convenient carrying case for your cook pot and accessories.
Materials & Tools
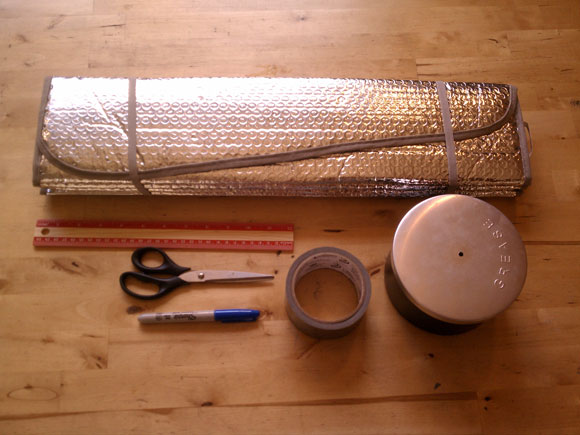
Materials & Tools:
- Cook pot or mug
- Auto sun shade made from Reflectix (looks like metallic bubble wrap)
- Duct tape
- Ruler
- Scissors
- Permanent Marker
Step 1 - Making The Backpacking Pot Cozy Sidewall
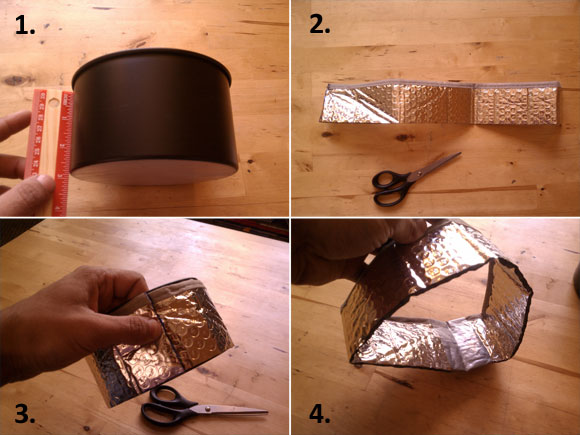
Instructions:
- Measure the distance from the bottom of the pot to the top lip.
- Cut a strip of sunshade material the height of your measurement and as wide as the circumference of your pot, plus a little extra.
- Wrap the strip around the pot and trim the overlap so the two ends but against each other. The fit should be snug, but not tight.
- Wrap a strip of duct tape around the two ends to connect them, forming a cylinder.
Tip: I use one of the finished edges of the sunshade for the top opening. This makes it easier for the pot to slide in and out without snagging and prevents wear and tear. An alternative method is to protect the top edge with a strip of duct tape.
Step 2 - Making The Backpacking Pot Cozy Base
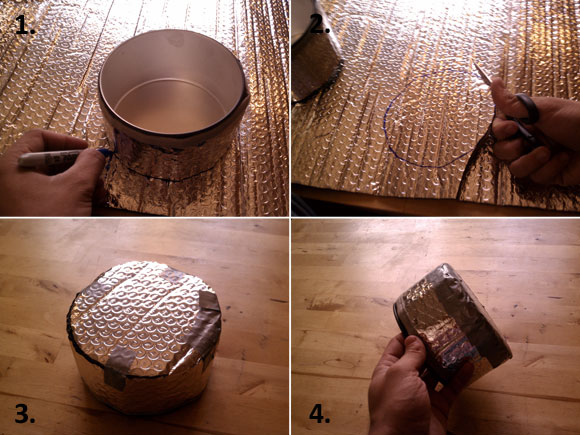
Instructions:
- With your pot inside the cozy cylinder, place it on the sunshade and trace a circle.
- Cut the circle out. This will be the base of your pot cozy.
- Leaving the pot inside the cozy, turn it upside down and attach the base using small strips of tape, starting at each corner.
- Continue attaching the base with small strips of duct tape all around the edge. Overlap each strip slightly to create an airtight seal.
Tip: Once the base is securely attached using small strips of duct tape you can wrap a single long strip around the exposed edges to prevent the tape from coming up. Your cook pot should now be able to easily slide in and out of your pot cozy.
Step 3 - Making The Backpacking Pot Cozy Lid
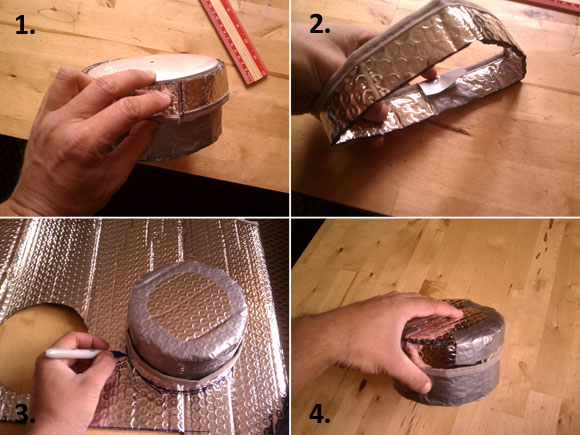
Instructions:
- Cut a strip from the sun shade that is 1.5″ tall and as wide as the circumference of the cozy with the pot inside, plus a little extra.
- Wrap it around the cozy and trim the overlap. Tape the two ends with duct tape, forming a cylinder. This will be the side of your lid.
- With the side of the lid in place turn the pot and cozy upside down and trace and cut another circle to make the top of the lid.
- Attach the top of the lid to the side using small strips of duct tape like the base.
Tip: As you did with the base, you can use a long strip of duct tape around the cozy lid to prevent the tape edges from coming up. Your lid should fit snugly enough around your pot and cozy that it doesn’t come off by itself, but not so tight it’s hard to put on.
Congratulations, you made a backpacking pot cozy!
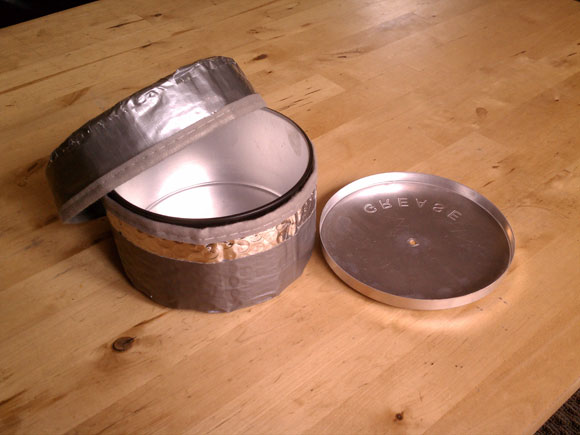
Your backpacking pot cozy will help you conserve fuel (and pack weight) and provides a handy method of storing your cook pot and accessories (like stove, lighter, mug, dish towel, pot scrubber, etc.) inside of your backpack. A pot cozy also makes it possible to eat your dinner while it’s still hot, without burning your hands.
How to use your backpacking pot cozy for cooking
Here are two ways you can use your backpacking pot cozy for cooking meals on the trail:
Cooking Method #1 – Boil water in your cook pot, add dried food to the water, allow to simmer for a minute or two (if necessary), then remove the pot from the stove and place it inside your pot cozy for 15 minutes. Your food will continue to “cook” while you set up camp (or wait impatiently). When you are done you will have a hot meal waiting.
Cooking Method #2 – This is known as “freezer bag cooking”. Boil water in your cook pot, pour boiling water into a freezer ziploc baggy with dried food, seal the baggy and put it back inside your empty pot (removed from heat), and finally place the pot (with baggy and food inside) into your pot cozy and let it set for 15 minutes.
You can eat your food directly from the baggy (kept inside the pot cozy so you don’t burn yourself) and you won’t have to clean your pot afterward. This method works better with some foods than others. It’s good for foods like mashed potatoes and cous cous that rehydrate quickly in hot water, but not so good for foods that require extended simmering time, like rice and pasta.
Affiliate Disclosure: If you order from the links on this website, I may receive a small commission at no additional cost to you. Thanks for your support!
Related Posts
Five Day Lightweight Backpacking Meal Plan
A complete 5-day meal plan for long-distance backpackers. Provides 3,500 calories per day from 2 lbs of food.
1,000 Calorie One-Pot Backpacking Meals
Sick of the same old trail food? Here are some of my favorite original backpacking meal recipes for you to try.
Top 10 Ultralight Backpacking Foods
Ten staple backpacking foods that are lightweight, shelf-stable, easy to pack and easy to prepare on the trail.
Example Lightweight Backpacking Gear Lists
Not sure what kind of gear to pack for your upcoming hike? Here are six example gear lists to help you get started.

