How To Minimize Hiking Foot Pain
By Erik The Black
It’s hard to enjoy the great outdoors when your feet hurt. Here are seven techniques to hep you minimize hiking foot pain.
Tip #1: Carry Lightweight Backpacking Gear
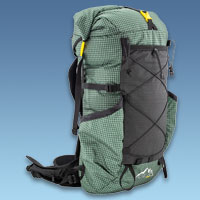
This may be the most obvious suggestion, but it’s also the most important. Every step you take sends a tiny jolt through your feet that is magnified by the weight of your backpack and all of your gear. Over the course of a long backpacking trip this can lead to hiking foot pain and injuries like: blisters, shin splints, heel spurs and plantar fasciitis. Reducing your gear weight means less impact on your feet and less pain.
Example Backpacking Gear Lists:
- Erik the Black’s Backpacking Gear List (13 lb base weight)
- Lightweight Backpacking Gear List (12.5 lb base weight)
- Ultralight Backpacking Gear List (10 lb base weight)
- Midweight Backpacking Gear List (16 lb base weight)
- Budget Backpacking Gear List (14 lb base weight, $1,000 budget)
- Day Hiking Gear List (13 lb full pack weight)
Tip #2: Wear Lightweight, Breathable Shoes That Fit
The best shoes for lightweight backpacking are trail-runners, cross-trainers and lightweight boots. When choosing a hiking shoe look for one that is lightweight, breathable, flexible and (most importantly) fits your foot. Traditional heavy leather boots are not good footwear because they are stiff and abrasive to the feet. Buy your shoes a half size larger than you would normally wear to make room for foot swelling, which can happen on longer hikes and cause hiking foot pain.
Popular Lightweight Hiking Shoes:
Tip #3: Wear Socks That Provide Enough Cushion (But Not So Thick They Overheat Your Feet)
When choosing hiking socks you want a combination of cushion and breathability. Too thin and they won’t provide enough protection from impact and rubbing against your shoes. Too thick and your feet will sweat like a sauna. Most backpackers wear lightweight hiking socks or running socks made from merino wool (and sometimes synthetic materials like Coolmax or blends).
Popular Lightweight Hiking Socks:
Tip #4: Replace The Cheap Insoles That Come With Your Hiking Shoes With Premium Insoles
Unfortunately, most hiking shoes come with cheap foam insoles. They don’t provide enough arch support or shock absorption and usually end up flat as a pancake within a few hundred miles. So you’ll need to spring for some high quality replacements. The good news is that most premium insoles will outlast the shoes they go in. And they make a big difference in reducing hiking foot pain.
Popular Hiking Insoles:
Tip #5: Take Frequent Rest Breaks, Remove Your Shoes And Elevate Your Feet
When hiking in hot weather, uneven terrain, or over long distances your feet will probably tend to swell and throb some. This happens when blood flows to your feet in response to the microscopic injuries that occur every time you slam them into the ground. To counteract this effect I recommend taking frequent breaks. Remove your shoes and socks, elevate your feet and rest them on your pack at every break. This gives your feet a chance to air out and for the blood to drain back into your legs and relieve any swelling.
Example 20 Mile Hiking Schedule:
- 6:00 am: Hike 2.5 miles (1 hour)
- 7:00 am: Rest Break (15 mins)
- 7:15 am: Hike 2.5 miles (1 hour)
- 8:15 am: Morning Snack (45 mins)
- 9:00 am: Hike 2.5 miles (1 hour)
- 10:00 am: Rest Break (15 mins)
- 10:15 am: Hike 2.5 miles (1 hour)
- 11:15 am: Lunch Break (1.5 hours)
- 12:45 pm: Hike 2.5 miles (1 hour)
- 1:45 pm: Rest Break (15 mins)
- 2:00 pm: Hike 2.5 miles (1 hour)
- 3:00 pm: Afternoon Snack (45 mins)
- 3:45 pm: Hike 2.5 miles (1 hour)
- 4:45 pm: Rest Break (15 mins)
- 5:00 pm: Hike 2.5 miles (1 hour)
- 6:00 pm: Dinner & Camp
Tip #6: Clean Your Feet Often (And Dunk Them In Cold Creeks Whenever Possible)
Nothing in the world feels better on swollen, achy feet than dunking them in a nice cold creek! The flowing water massages your tootsies, increases circulation, numbs the pain, reduces inflammation and makes everything feel good.
As an added benefit, it cleans off the abrasive grime that will accumulate on your feet as an unfortunate side-effect of wearing breathable shoes with lots of mesh panels.
Too bad there is not always a good creek available. But it’s still a good idea to clean your feet at every rest stop. When there is no convenient water source nearby, you can use a moistened bandana or pack towel to wipe off the grime.
Keeping your feet clean and smooth and free of gunk goes a long way toward preventing hot spots and blisters by eliminating one of the major causes of friction between your feet and socks (dirt.) Clean feet are happy feet!
Tip #7: Be Proactive About Fixing “Hot Spots” (Before They Develop Into Blisters)
If you carry lightweight gear, wear good shoes, socks and insoles, take frequent rest breaks and keep your feet clean you will have eliminated most of the sources of friction that cause blisters. But sometimes they are unavoidable, and that’s when you need the “McGuyver” of hiking remedies: duct tape.
There are commercial blister bandages (like moleskin, second skin, etc.) but none of them work as well as duct tape. The beauty of duct tape is that it’s slippery on the outside and super-sticky on the inside. Apply it to a hot spot on your foot and it will stick for a long time, even with sweaty feet, while the slick outside surface glides smoothly against your socks.
The key is to apply duct tape as soon as you start feeling that tell-tale tingle of a hot spot. DO NOT put it off until your next planned break. Stop and tape immediately.
Despite your best efforts you may still develop a blister. Here is the best way I know to fix them: Wait until you get to camp (don’t mess with it while you still got walking to do). Run a threaded, sterilized needle through one end of the blister and out the other side, leaving the thread in place overnight. As you sleep, the puss will leach out along the thread, slowly draining the blister, and in the morning it will resemble a flat, dry, hard callous.
Seal the ex-blister with Liquid Bandage and duct tape or band-aid over it. If possible, identify and eliminate the source of friction that caused the blister in the first place, so it doesn’t cause further aggravation.
Last Resort: Take Ibuprofin (“Vitamin I”)
If nothing else works, you can always turn to drugs. “Vitamin I” is the pet name given to Ibuprofen by hikers, because it is a very popular anti-inflammatory and pain medicine on the trail. Drugs do not eliminate the source of hiking foot pain, but they can provide temporary relief by numbing the pain and reducing swelling until you can find and fix the real problem.
Affiliate Disclosure: If you order from the links on this website, I may receive a small commission at no additional cost to you. Thanks for your support!
Related Posts
Example Lightweight Backpacking Gear Lists
Not sure what kind of gear to pack for your upcoming hike? Here are six example gear lists to help you get started.
Five Day Lightweight Backpacking Meal Plan
A complete 5-day meal plan for long-distance backpackers. Provides 3,500 calories per day from 2 lbs of food.
1,000 Calorie One-Pot Backpacking Meals
Sick of the same old trail food? Here are some of my favorite original backpacking meal recipes for you to try.
Top 10 Ultralight Backpacking Foods
Ten staple backpacking foods that are lightweight, shelf-stable, easy to pack and easy to prepare on the trail.


