The best ultralight backpacking foods are lightweight, nonperishable, high in calories and easy to prepare. Here are seven more ultralight backpacking foods that provide a high calorie to weight ratio, making them ideal for ultralight backpacking.
1. Oatmeal
110 calories per ounce (with dried fruit, powdered milk & sugar)
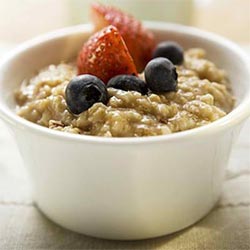 Oatmeal is a staple ultralight backpacking breakfast. It is lightweight (two packets weighs only 2.5 ounces), easy to prepare (just add boiling water) and can be spiced up with dried fruits, nuts, honey, sugar, and other flavors.
Other dried cereals (like grits, polenta, cream of wheat and granola) are also good for variety.
Here is a breakfast cereal recipe that I eat all the time on my long distance backpacking trips.
2. Freeze Dried Dinners
125 calories per ounce
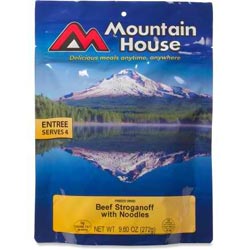 Freeze Dried Dinners tend to be kind of expensive ($6 – $8 apiece) but they are super convenient (just add boiling water to the bag). A couple of backpacker meals can really help break up the monotony of boring trail food.
Mountain House, Backpacker’s Pantry and AlpineAire are some popular brands. Some recipes are good and some not so good… and some will cause you to blow your asshole out (my advice, stay away from the chili recipes).
My favs are: Pasta Primavera, Vegetable Lasagna and Chicken & Dumplings.
3. Home-Made Dehydrated Food
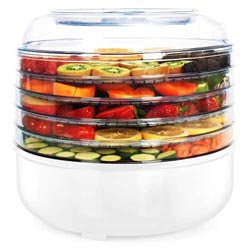 You can make your own dehydrated backpacking foods. All you need is some time to experiment and a food dehydrator.
I haven’t tried dehydrating my own backpacking foods yet. My culinary skills are limited and I usually prefer the “buy as you go” method for resupplying on my long hikes. But this is something I want to try someday.
If you want to try making your own backpacking foods here are a few books to get you started: One Pan Wonders, Lip Smackin’ Backpackin’ and Freezer Bag Cooking.
4. Energy/Granola Bars
96 calories per ounce (Clif Bar)
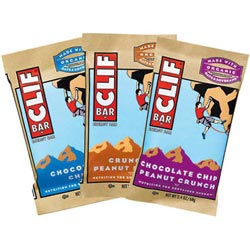 Energy Bars don’t make their way into my food bag that often, but lots of my hiker friends love them. Some of the more popular energy bars are: Clif Bars, Power Bars and Granola Bars.
Unlike Snickers Bars and other candy bars (which are also popular backpacking snacks), energy bars are made with less sugar, more whole grains and healthier ingredients.
In my experience they don’t really provide more energy (that is just an advertising gimmick) but they are more healthy than candy bars.
5. Couscous
112 calories per ounce (with olive oil)
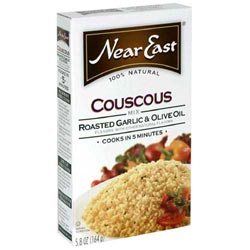 Couscous is an African pasta dish that makes a delicious, convenient backpacking dinner.
Like mashed potatoes, couscous does not require much cooking time. Just add boiling water and let it sit for a few minutes in your pot cozy until it “fluffs up”.
I buy the Near East brand because it comes in several different flavors (like parmesan, cheese and broccoli and herb chicken).
Prepare with olive oil and foil-pack tuna or chicken for extra calories and taste.
6. Beef Jerkey
80 calories per ounce
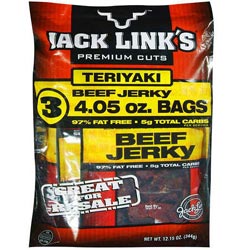 Beef Jerkey is not very high in calories. But it is one of the few protein foods that is practical to carry on a long distance backpacking trip.
Although protein is not as good a source of energy as carbohydrates, it is important for maintaining weight and rebuilding muscle and body tissues that get broken down while hiking.
Beef jerkey is lightweight, easy to pack and doesn’t spoil. It’s an excellent snack by itself, or can be added to dinners (like mashed potatoes, rice, pasta) for extra flavor, protein and calories.
7. Dried Fruit
84 calories per ounce (raisins)
 Dried Fruits don’t provide as many calories as junk foods, but they provide higher quality nutrition. Dried fruit is packed full of vitamins, minerals and natural sugars and carbs.
The most popular dried fruit is probably raisins, but you can also pack banana chips, dried apricots, apples, blueberries and other dried fruits for quick energy on your hikes.
Pre-packaged dried fruit is available at most grocery stores and it’s pricey. If you have a dehydrator you can make your own at home.
These are just a few of the backpacking foods that I like to eat on the trail. What high calorie ultralight backpacking foods do you recommend?
Please post your comments below…

 My name is Erik Asorson, aka "Erik the Black." I'm a long-distance backpacker, cartographer and author of


One thing I have yet seen mentioned on any ultralight site is Spirulina. Spirulina is a dehydrated algae that is so nutrient dense that you could survive on it and water alone for a very long time. Certainly in the interest of rigorous hikes you will want to concentrate more on energy from carbs and the maintenance of muscle through proteins, but if you or anyone else is interested in sustaining a healthy diet through an extended trek, Spirulina is the way to go.
You can get it in tablet form and swallow it like a pill. It is crazy compact and lightweight for the amount of nutrition you get from it.
Another thing that may be of interest to some is the issue of herbs and spices. The density of vitamins per gram of any food is usually found in an herb or spice. In addition, there are a lot of salves or poultices that can be made out of herbs that are a fair if not better substitute for traditional first aid. Dried herbs and spices are usually very light and not very bulky.
All of these items have a very long shelf life though with anything, keeping them in the freezer extends that life.
I love to bake bannock on the trail..it can be a little time consuming to prepare but after that you got bannock dough for at least 3-4 full meals depending on how hungry you are.. here’s my recipe:
500g spelt flour
100g sugar
100g milk powder
2 handfuls of oats or granola
1 pack vanilla sugar
1 tsp cinnamon
1 pack baking powder
1 hand full of raisins or other dried fruits – dried apples go well with the cinnamon flavor
about 450ml water..
mix all the dry ingredients in a ziploc bag and add some preferrably luke warm water. on a warm day the water doesnt need to be warm.. the sun will do the rising of the dough for you. mix all the stuff up and let it sit for a while leaving the bag a crack open so the dough can rise.
now close your ziploc bag and cut off a small corner on the bottom (this can be sealed with duckt tape for storage). now you can squeeze out the dough into a pan or pot. if your pot or pan is coated you dont need to use oil, otherwise i’d recommend some vegetable oil to prevent sticking. press the dough flat in the pan and fry it like pancakes. you can also lay stones in your fire and cook the dough on the hot stones or just squeeze some dough right in the ashes next to the coal and make ash cake.
i like to spread peanutbutter, jelly or marshmellow fluff on the cake prior to eating them. when you fry them well the cakes also store well in a ziploc bag.. or you can store the dough and make ’em fresh.. – i like to eat them fresh! its very filling! if you got some rum you can also drizzle some rum on em when they’re ready.. rum flavoring also does the trick!
bannock is a form of bread made by primitives around the world.. the main ingredients are flour, some form of fat, yeast or baking powder and water you can basically stick anything you like into that mixture. you can also make a loaf by coating a pot with oil and sitting it amongst the hot coals with the lid on.. put some coals on the lid also for a nice crust on the top side..
one of the easiest & most practical protein sources I’ve found is to cook ground beef (I use a pressure cooker or crockpot), drain the juices & dehydrate on sheets in the dehydrator. Once it’s crispy dry, I powder it in a blender and add to already dehydrated meals at the rate of 1.5 oz daily (which translates to about 4 oz raw beef).
Would like to add edamame, its soybeans that just need to be heated once and can be eaten cold.
Also, similar to cous cous is quinoa, which cooks just as fast as former but not as tasty in the packaged kinds. It’s in a rare breed of foods w/ all essential amino acids including protein.. also a space food.
Yes, it is. I pack in the oven bag – lighter than baggies. When I am ready to cook, I put the requisite amount of water into the bag, fold it lightly closed to allow venting, then set the bag into a pan with about 16 oz in the bottom. Don’t have to clean pans! People, especially teens, mack my food when they see it in the dehydrated state, but change their tune when they smell it cooking, and if I let them have a (very small) taste when it is done.
A word of warning – dehydrated foods will always be a bit chewey and any flavors will be stronger, so if you are cooking something spicy, go east. Same with using soy sauce or Yoshidas – use less for food you plan to dehydrate than you would for dinnertime at home.
@Steve: Thanks, that sounds like a great idea. I have poured boiling water into ziplock baggies of food before, to avoid doing dishes, but never thought to actually set the bag in the boiling water (which sounds like it would work great for foods like mac and cheese that require a little more cooking time). Some people have also mentioned that plastic ziplocks may leach a small amount of chemicals into the food when exposed to hot water. Since the oven bags are designed to come in contact with heat it sounds like they might be a bit safer in that regard.
I dehydrate my own meals, and pack them in Ziplock freezer bags (qt size). When I am on a trip, around mid-afternoon (snack time), I put my dinner, still bagged, in the pot and add water directly to bag. Leakage is minimal, and the water doesn’t slosh around. By the time I get to my dinner spot, the food is rehydrated and I only need to heat it up – this method ensures that a) there aren’t any chewy bits and b) I only use enough fuel to heat my food – not heat AND rehydrate – so it saves on fuel weight, too!
Erik,
I have dehydrated for years and it is Oh so easy, and makes the other hikers extremely jealous. Whatever my wife or I cook for dinner (sweet and sour chicken, beef stew,chicken and broccoli, etc.) goes in the dehydrator. I weigh it before drying so that I know how much water to add. I use a simple Esbit-type stove with a covered pan and a windscreen. Light the fire, go do something else. Twelve minutes later, my meal has boiled for about five minutes, the flame has gone out, and the cover keeps it hot for quite a while if I don’t get right back to it. I cook in an oven bag resting in about 16 oz of water. When I am done, my pot is clean, my water heated for coffee or hot chocolate. I you use an actual Esbit brand stove, cover the vents – they make for a hotter flame, but the burn time is shorter.
@Steve Hackney: Thanks for the great dehydrating advice. When you say you cook in an “oven bag” is that like the plastic bags used for cooking turkeys?
Erik- just got around to getting back to the “Ultralight Backpacking Foods” article.
I found freeze dried checken, beef and about anything else imagineable on a website
called “Survival Acres” -along with the traditional Mountain House dried meals, they have everything separate under various labels for concocting just about any meal you would wish..
I was thinking of getting a stove with a single titanium pot(like the trek 700) to save weight, but how do you cook something like oatmeal from the packets since you have to add oatmeal to the water rather than viseversa? Second, I noticed in your gear list, you had a small 110g canister of fuel counted as 3.5oz in weight. I put one on my scale and it says 6.1oz. So, is 3.5oz only the container without fuel?
@Steve: The Snowpeak Trek 700 is actually what I use as my primary cooking container. There are a couple of ways you can cook with it.
You can carry only the mug and use it as a pot, bowl and cup. Or you can carry a separate container (such as an empty plastic Tang Container, small titanium or plastic mug or lightweight measuring cup) to use as a cup or bowl. I’ve done it both ways.
If you carry only the mug then you can boil water in the mug, add the food to it, stir it up and eat (or put it in a pot cozy for extra cooking if necessary). You can also put your food in a ziploc freezer baggy, put that in a pot cozy, then boil water in the mug and pour it into the baggy.
If you carry a separate container it makes it a bit easier. Put your food (like oatmeal) in the container, boil water in the mug and then add it to the container (and put that in a pot cozy if necessary). You can also enjoy a hot drink with your meal without boiling water twice. Just boil the amount of water you need for both food and drink, pour half of the water into the food and then add your drink powder (like hot chocolate, coffee, etc.) to the remaining water in the mug (or vice versa).
Yes, 3.5 ounces is the weight of the container minus the fuel. Since fuel is a consumable item it’s usually excluded from gear weight calculations.
I have been using a Coleman exponent backpacking stove (very similar to the pocket rocket) for several years with a small aluminum pot that the stove and fuel cannister will fit into. The stove weighs in at 1.7 ounces and the fuel cannister I carry is either 8 ounces or 16 ounces depending on how long I’ll be out. The cost of the stove was $40 back then and is still about the same.
The pot weighs 6 ounces (without the lid which is about 1 ounce). It can hold 1.5 liters of water, which is a bit more capacity than needed. But the extra volume can come in handy from time to time. Titanium would be lighter but I haven’t gone there yet—on my wish list.
Hope this doesnt get too off topic, but, Im a long distance cyclist who is getting ready to tour the USA, and average 90 miles a day. While looking for foods that are light, supermarkets or a store of somekind will usually be available. However, not always. So, when picking a light stove, would you reccomend a jetboil or opt for something like the pocket rocket or new soto od-1 stove? Im planning on having oatmeal packets in the morning with an energy bar, and ramen noodles, mac and cheese, or something like that on occasion for dinner.
@Steve: I have used a MSR Pocket Rocket, Titanium Mug and a home-made pot cozy as my cooking system for years and it works great. It’s a similar setup as a Jet Boil, but without the insulated cup. The advantage of the Jetboil is that it is a bit more efficient because of the insulated cup and it’s all designed to work and fit together. The disadvantage is it’s more expensive and heavier. Most canister stoves work the same way, so any one you pick should do the job.
What a great amount of information from everone. One item I’d like to add is that in the weight to calorie ratio, fats are 2.25 more efficient than carbs and proteins. While carbs are best for getting the energy into your system, fats are great for packing for long trips. For fats, I generally take nuts/nut butter and coconut anything. Justin’s nut butters are so very easy too.
Also, I have tried anything I can get that is a powder that can be reconstituted. Perhaps hummus is my favorite, but like anything, it can get old.
I have personally found that there is no need at all to bring beef jerky or anything designed to be your “protein” for the trip. All freeze dried dinners contain a lot of protein, as do nut butters and energy bars.
Last summer I was in a group of five hiking six days from Echo Lakes to Donner along the PCT. We carried mostly freeze dried Mountain House dinners, oatmeal reinforced with GORP/fruit and nuts, plus beef jerky, Clif bars and concentrated fruit bars; also Power Gels, instant coffee and hot cocoa mix— pretty standard stuff. I tossed in one fresh onion for a kick.
By about day three I could tell we weren’t taking in sufficient calories. We were also shorting ourselves on Protein without realizing it. We did OK but we could really feel the uphills, at times in heavy snow. Couscous would have been a good addition; also nut butters. Thanks to all for sharing your stories. Lots of great suggestions for adding calories and nutrition.
@Shanna: That recipe sounds delicious! I will definitely have to try that. Do you buy freeze dried chicken? If so, where do you get it?
@Sabi: I’ve never heard of Marzipan before, but it sounds good. I did a search for marzipan on the websites of three grocery chains here on the west coast (Vons, Stater Brothers and Albertsons) and nothing came up. So you may have to bring it with you (or maybe find some at a bakery or specialty store).
Marzipan can be bought at the craft stores like Davids or Hobby Lobby.
You can also make it easily at home and take it with you. It lasts a very long time if you make sure to seal it air-tight 🙂
I do dry my own food for trips in Europe, but taking it to the US from Europe is not an option (at least not when there is meat in it).
I second the question of Mark as I will also hike the PCT in 2012. And I hope you are right about the learning curve while getting up north.
My calorie booster beside some of the mentioned foods is marzipan in raw version as it is used for baking, etc. – high season at the moment!
When waking up during the night 2 or 3 bites bring you back in a cozy sleep almost immediately.
My question: Is it available in the US/CA/OR/WA or do I need to bring tons with me? 😉
Stumbled quite by accident on a great do-it-yourself dinner that is to die for!! I now concoct all my dinners courtesy of
freeze dried meats, and anything else I can get my hands on – Also make my own seasoning mixes depending on the flavor I’m looking for.
This is a Thanksgiving dinner in the backcountry!!
Freeze dried chicken, instant yukon gold mashed potatoes, stove top stuffing,
partial package of turkey gravy mix, dried cranberries. Throw it all together in a
zip lock (surprisingly lightweight)
Reconstitute with boiling H20, let sit for
several minutes and ENJOY. The aroma is
incredible..
Ramen and mint tea when it’s cold, then toss the Jet Boil back home at a P.O. and eat berries. Buy a little fruit in the towns, and power-type bars. Hike and your appetite takes a hike, too. Sleep with nightfall, wake at dawn refreshed and ready again for the trail.
You may want to check out Bliss Bars: Organic Superfood energy bars http://www.theblissbar.org/ made with the most nutrient dense and mineral rich superfoods in the health food industry.
142 calories per 1.1ounce bar, and a healthy dose of raw cacao (dark chocolate).
You may want to try a new product called PocketFuel – http://pocketfuelnaturals.com/ I have started using them in my hiking and backpacking activities. Most excellent! They are also on Facebook….
For the record, the rice (or any other grain or legume) that you’re adding to your food before dehydrating it (above in the dehydrating your own food post) should already be fully cooked. I wasn’t sure if that was clear to the uninitiated!
I typically prepare a hot meal in the evening The combination of a variety of soup mixes and Ramen provide a variety of flavors and are inexpensive, light weight alternatives to freeze-dried, pre-packaged foods.
I can’t say enough about my discovery of protein powders. Mix up a flavored protein shake with dried milk and a glutamine suppliment a couple times a day for a satisfying, sweet, and surprizingly filling snack or meal replacement. Since I began regular use of protein suppliments, I have found my body recovers much faster from the rigors of trail life.
Hey Erik, Love your site. You’ve said that you prefer to resupply as you go. I am thinking of doing the same on my pct thru hike in 2012. I wanted to ask you if you would give a breakdown of how you do it, such as towns that you buy food at, what town has good selection, what town does not, maybe you recommend sending supplies to certain towns, which ones, etc. I’ve never done a thru hike, and the thought of “wing’n it” as I go is a little scary. ( don’t want to starve!) I hope you can do that for me. Thanks, Mark
@Mark: You can find info about trail towns and supplies in my Pacific Crest Trail Atlas guidebooks. There are a lot of towns near the PCT. In California most have a good selection of food. As you get further north into Oregon and Washington the towns get smaller and further apart.
I try to go into town and resupply about every five days on average. Up north where there are fewer towns what I do is buy a couple weeks of food in the larger towns and then send forward food-drops to the smaller towns with post offices but no good grocery stores.
Resupplying on the PCT is pretty easy. If you hike northbound it’s cake in the beginning, and by the time you get to the more challenging parts up north you’ll have your routine down so well that it’s easy to figure out.
Erik,
You are missing the undisputed champs of the edible calorie per ounce game … Girl Scout Cookies!
Most of the varieties weigh in above 140 calories per ounce.
Eric,
I dehydrated ALL my food for my AT thru-hike, so I thought I’d share about it with you and your readers.
One thing I don’t think people realize is that they don’t have to dehydrate individual ingredients and then reassemble them to make a meal once on the trail. You can actually make a complete dish and dehydrate it, making it just as easy to rehydrate and eat as a Mountain House meal, at a fraction of the cost. And better yet, you don’t even have to be a cook!
One of my favorite strategies is to order an extra entree when I go out to eat, for example Thai chicken coconut & vegie curry. When I get home I put a generous serving of rice in my “backpacking bowl” and then smother it in the curry and mix it so the rice is thoroughly coated. I use the bowl to help me measure up a good hearty sized meal for the trail. Then I pour it out onto my fruit leather tray (plastic with 1/2″ turned up edges).
TIP: One thing that’s critical to remember about getting things to dehydrate uniformly as well as rehydrate uniformly in a reasonable amount of time is that you need to cut things up into 1/4 to 1/2 inch pieces max. So before putting the tray into the dehydrator I take my kitchen scissors and cut up the chicken (meat) and veggies into small relatively uniform pieces. It really only takes a minute or so. Of course when I cook whatever it is that I’m dehydrating I just cut everything small to begin with.
Anyway, once it’s all dehydrated put it in a freezer bag and you got yourself a damn tasty meal! Note: anything with meat or beans in it will take a little longer to rehydrate than just veggies and grains, so if you try to eat and things are still a little crunchy you’ve just got to leave it in the cozy longer.
Remember that dehydrated meats and fats can go rancid in a matter of three weeks or less after dehydrating unless you keep it in the freezer until you leave/mail it off to yourself. If you vacuum seal it, it will keep much longer out of the frig/freezer, but it’s still a good idea to keep it in the freezer until you need it.
Since I love to take spontaneous short BP trips, I try to keep a stash of meals in my freezer at all times by throwing one or two in the dehydrator whenever I cook up a big pot of anything (chilli, curried lentil dahl, shephard’s pie, turkey and stuffing around Thanksgiving and Christmas (which I add extra water to on the trail to make a fantastic savory turkey & stuffing stew on the trail). Then all I have to do is grab what I need and I’m off!
Sometimes you want to consider density as well, like when you have to carry a bear canister or just want to keep your pack small.
Angel hair or other stick pasta comes to mind as one of the most compact pastas.
Dehydrated food can be much more compact than freeze dried, but less convenient.
Nut and peanut butters, good all around compact food. But don’t try to have it for every meal or you will get sick of it:-)
Somethings to think about if you have to spend multiple days with a bear canister.
After the first 100 miles or so, I need real food (dehydrated stuff isn’t worth the weight–engineered nutrition doesn’t power my body well); I also prefer grazing to big meals. Babybels or just wax covered hard cheese (esp. ) cheddar, provides lots of fat, protein, some calcium–adds a nutrition punch well worth its weight, and they last for weeks. Nut butter + Nutella (or an organic brand if you wish) mixed in a squeeze tube. With these heavier weights, I can either go with jerky/nuts/dried fruit or cook up cous cous/oatmeal and get energy/protein without a heavy foodbag. The weight of an apple, grapes or avocado for the first few days out always feels worth it–and doubles as water. I add some sort of protein bar for emergencies when I need to eat and can’t stop.
Sorry that I am joining in on this REALLY, REALLY LATE but I had to ask: EJ, I’m curious…what is “real food” to you? You had specified that dehydrated food are no good for you–they do rehydrate, of course. I’m dehydrating ALL of our main meals (ALL of which are from either leftover dinners or made especially for our coming trip) and am taking along bars, nuts, dehydrated fruits and homemade jerky. THESE are what I consider to be REAL FOOD! *shrugs*
salami and cheese keep well for several days if it is less than 80 degrees
fritos, nachos, pretzels are nuticious but bulky
hard dark bread
dried peaches taste best
raw granola
carrots and apples for the first 2 days
triscuits, cookies and crackers
nuts including peanuts have fat and protien
STAY AWAY FROM THE CHILI RECIPES! Hahahaha… we just went for a 5 day hike in the smokies and a buddy of mine had the wild west chili on day 1. What a mistake! He spent the 4 days with 1 thing in mind… “where’s the next privy or place to dig a hole?”
Hmmmm, one that folks have forgotten but is used alot on the trail is Peanut Butter!!! (or some type of nut butter) It can be added or used by itself and some even eat it straight out of the jar!! Dietary needs vary from person to person, but I agree, a balanced diet is always best. We focus on calorie intake but forget that we need protein and fat to keep things moving along.
Will have to try the couscous sometime and see how it fares with my system. I wish some of these freeze dried ones had one serving packages as I am not a huge eater it seems at any time during a hike. I tend to “graze” during the day vs eating a big meal.
I dehydrate some of my own food, and have tried various dehydrated and freeze dried meals, but with only limited success.
My food list is very similar to yours. Breakfast consists of a couple of oatmeal packages and some dried fruits and nuts.
Lunch consists of a clif bar and beef jerky. I don’t view clif bar’s as energy bars, but rather as nutrition in a bar shape.
Dinner usually consists of Mountain House Beef Stroganoff and/or any freshly caught trout where it’s acceptable to catch and eat.
I’d like to try the couscous.
I carry Justin’s Nut butters in their squeeze packs. The almond butter squeezed into oat meal is great! And you can still add other goodies along with it. It adds protein to the meal. Give it a try you wont be disappointed with the taste.
Hey Erik,
I switched to mostly no-cook hiking in early 2011 and it was a difficult change but it helped me learn some additional aspects of being on the trail long term.
Towards the middle of my 2011 hiking season I began to realize that I was lacking in protein so I ordered some of that Optimum Nutrition Platinum Hydro Whey stuff. Way expensive but it provides 30 grams of standard protein and 8.8 grams of BCAA.
For far to long we in the long distance community have been talking about only calories and forgetting there are other factors we need to consider when planning our long distance hikes.
An alternative to Mountain House is HawkVittles.com which has been supplying the vast majority of my hiking food for the past two seasons.
Have a great holiday and enjoy that nice cold weather you are having!! Looking like more snow tonight!